Why Replacing a Light Switch Isn’t as Scary as It Sounds
Ever flip a light switch and nothing happens? Or maybe it crackles or feels loose? That’s our cue—it’s time to replace light switch hardware.
Now, before panic sets in, take a breath. Replacing a light switch sounds like a job for an electrician, but it’s totally doable for us DIYers. With the right tools and a few safety steps, we can knock this out in under an hour.
We might be updating an old, worn-out switch. Maybe we’re upgrading to a dimmer. Or perhaps we’re just tired of that yellowed plastic from the ‘90s. Whatever the reason, this small fix can make a big difference.
Of course, electricity isn’t something to mess with blindly. But that doesn’t mean we should be afraid. When we cut the power and follow each step carefully, this project is safer than most folks think.
So grab your screwdriver, roll up your sleeves, and let’s replace that light switch—the smart, safe, and confident way.
Tools & Supplies You’ll Need
Before we dive into how to replace light switch parts, let’s make sure we’ve got the right tools on hand. Most of these are things we might already have lying around. If not, they’re easy to find and won’t break the bank.
Here’s what we’ll need:
Flathead & Phillips screwdrivers – These help us remove the faceplate and switch screws. Most switches use Phillips, but it’s good to have both.
Voltage tester – Safety first! This tool tells us if the power is really off before we touch any wires.
Wire stripper – We’ll use this to remove insulation from the wires, especially if we need to trim and reconnect.
New light switch – Make sure we grab the correct type (single-pole, three-way, etc.). The old switch should match the replacement.
Electrical tape – A simple way to cover exposed terminals and secure wire nuts. It adds a layer of protection.
Needle-nose pliers – These help us bend wire ends into tight hooks for the new switch terminals.
And here’s a pro tip: Every item here is affordable and easy to find at any local hardware store.
Want to make life even easier? Optional tools like a headlamp (for dark rooms) or labeling stickers (to keep wires straight) can help a lot.
When we’re geared up with the right tools, we’ll be ready to replace light switch components quickly and safely.
Safety First: Before You Touch a Wire
Before we replace light switch parts, let’s talk safety. Electricity isn’t something to take lightly—but it doesn’t have to be scary either.
First things first, we always turn off the power at the breaker box. We find the breaker labeled for the room we’re working in and switch it off. But we don’t stop there.
Next, we double-check with a voltage tester. Just because a switch is off doesn’t mean the wires are dead. Touch the tester to each wire and screw terminal. If the tester lights up or beeps—stop! There’s still power, and we need to find the right breaker.
Even if the light switch no longer turns the light on, that doesn’t mean it’s safe. Some wires can stay live, especially in older homes. So we never trust the switch alone.
Also, no wet hands. No bare feet. We wear shoes with rubber soles and work in a dry, clean area.
Here’s a quick tip: tape the breaker switch into the OFF position. That way, no one flips it back on by accident while we’re working.
Now, if we open the box and see aluminum wiring, or if the wires are a confusing mess, that’s our cue to pause. Aluminum wiring needs special connectors and handling. And if we feel unsure at any point, there’s zero shame in calling a licensed electrician.
Staying safe isn’t about being paranoid—it’s about being smart. When we respect the process, we can replace light switch components with total peace of mind.
Step-by-Step: Replace Light Switch in 5 Quick DIY Steps
Ready to replace light switch components on your own? With a few basic tools and a bit of patience, we’ve got this. Let’s walk through each step with safety, clarity, and confidence.
✅ Step 1: Turn Off Power and Test for Safety
First things first—head to your home’s breaker box. We need to turn off the power to the room where we’ll be working. It’s usually labeled (e.g., “Living Room” or “Bedroom”). Flip that breaker switch to OFF.
But we don’t stop there. Next, we grab our voltage tester. Test the light switch itself and the surrounding outlets just to be sure. Some circuits share connections, and we don’t want any surprises.
We hold the tester to the screw terminals and wires. If there’s no light or beep, we’re safe to move forward. But if it lights up, try a different breaker—it may be mislabeled.
This step might feel like overkill, but it’s essential. When we replace light switch wiring, confirming power is off is the most important part of the job.
✅ Step 2: Remove the Old Switch Cover and Screws
Now let’s open things up. Start by removing the faceplate with a flathead screwdriver. Set the screws and plate aside where they won’t get lost.
Next, unscrew the mounting screws that hold the switch to the electrical box. These are typically Phillips screws—easy to spot.
Gently pull the switch out from the wall just a couple of inches. We want to expose the wires without pulling anything too hard.
Here’s a handy tip: Take a quick photo of the wiring setup before touching anything else. It’s a great reference when installing the new switch. Plus, it helps us stay organized and confident.
This step is all about patience. Once we can clearly see the wires, we’re ready to move on to the next part of the job—disconnecting and prepping them.
✅ Step 3: Disconnect the Wires
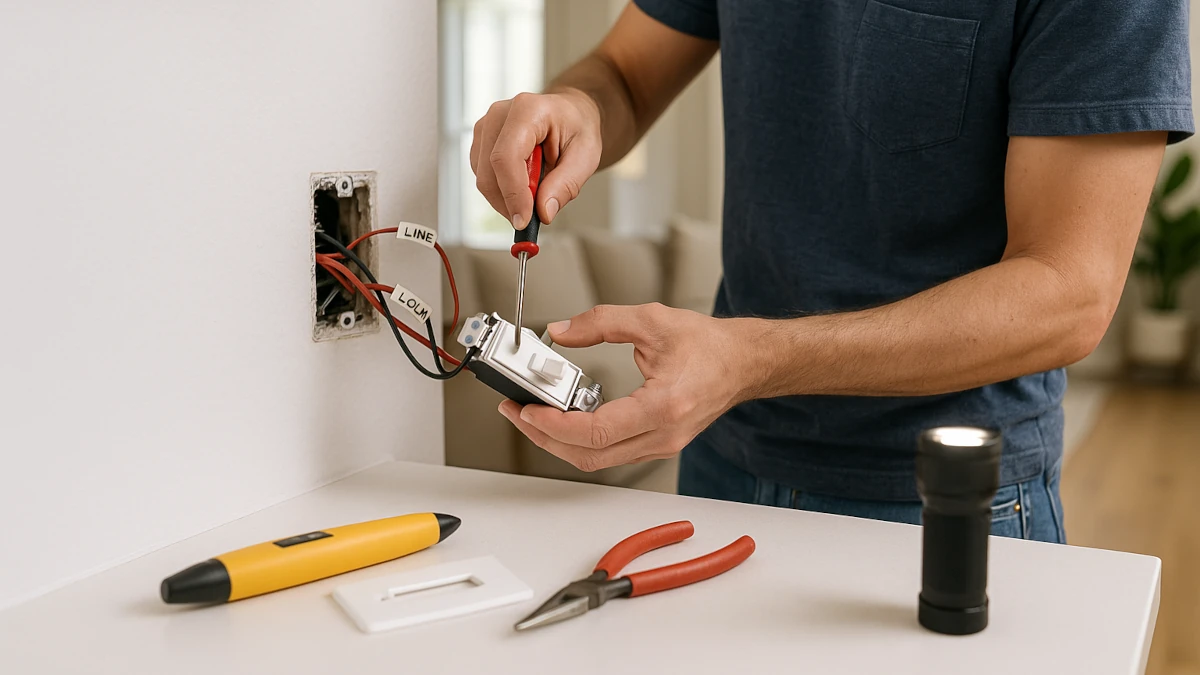
Now comes the part where we get hands-on. Before we disconnect anything, let’s note where each wire goes. Usually, we’ll see:
- Line (hot) – brings power into the switch
- Load – sends power to the light
- Ground – typically bare copper or green
- Traveler wires – if it’s a three-way switch
If we didn’t take a photo in the last step, now’s another great time to do it.
Start by loosening the terminal screws holding the wires in place. Some switches also have push-in connections. If that’s the case, look for a small release tab—pressing it with a flathead screwdriver will free the wire.
Handle the wires gently as we pull them free. If any wire ends are bent, frayed, or damaged, we’ll want to trim and strip about ½ inch of insulation with our wire stripper.
Remember—this is all about getting the wires clean and ready for the new switch. The better we prep now, the easier the next step will be.
✅ Step 4: Connect the New Switch
Here’s where it all comes together. Grab the new light switch—make sure it matches the type we removed (single-pole, three-way, etc.).
Now let’s reconnect the wires. Follow the same layout as before:
- Ground wire goes to the green screw
- Line and load wires go to brass or silver screws
- Traveler wires (if needed) connect to the designated terminals
Use needle-nose pliers to loop the ends of the wires into a “J” shape. Hook them clockwise around each screw. Why clockwise? Because when we tighten the screw, it pulls the wire tighter—never looser.
Tighten each screw firmly, but don’t overdo it. The wire should feel snug and secure.
For push-in connections, insert the wire into the appropriate hole until it clicks in place. Give it a gentle tug to make sure it’s locked.
Here’s an extra safety move: wrap a bit of electrical tape around the switch body, covering the terminals. This keeps everything insulated, especially when space is tight inside the box.
Before we put it all back, double-check each connection. A few extra seconds here can save us from headaches later.
✅ Step 5: Reassemble and Restore Power
We’re in the home stretch! Carefully tuck the wires back into the electrical box. Push slowly and evenly so nothing gets crimped or bent too sharply.
Align the new switch with the mounting holes. Then, screw it into place with the mounting screws. It should sit flush with the wall—no wobbles.
Once that’s secure, reattach the faceplate. This is the easy part—but still satisfying!
Now, let’s head back to the breaker box. Flip the breaker switch back ON.
Moment of truth—test the new switch. If the light comes on and everything feels solid, we’re golden! If it doesn’t, don’t panic.
Here’s what we check:
- Was the correct breaker turned back on?
- Are any wires loose inside the box?
- Did we mix up line and load connections?
If needed, turn the power back off and carefully recheck each step. Most issues come down to a loose wire or a reversed connection.
Once everything works properly, we’re done! We’ve just learned how to replace light switch wiring safely and effectively. And we did it ourselves—with no electrician bill in sight.
Troubleshooting Tips for Common Issues
Even when we follow every step to replace light switch wiring, things don’t always go perfectly the first time. Don’t worry—most issues are easy to fix. If the light doesn’t turn on, double-check the breaker. Sometimes it looks on but isn’t fully reset. Flip it off and back on firmly.
Next, we remove the faceplate and confirm all wires are tightly connected. A loose wire can stop the flow of power. While we’re at it, make sure the line and load wires didn’t get mixed up. If the light flickers, the bulb might be the culprit. Try a fresh one. Still flickering? It could mean a wire isn’t secure.
See sparks when flipping the switch? That’s a red flag. Turn the breaker off right away and call a licensed electrician. It’s not worth the risk. When we replace light switch components, a little patience goes a long way. Most fixes are simple once we know where to look.
Final Safety Check & When to Call a Pro
Before we wrap up, let’s do a quick safety check. The switch should feel snug and operate smoothly—no wobble or sticking. Listen closely. There should be no buzzing, no flickering, and definitely no heat. Everything should feel cool and quiet.
If something doesn’t seem right, don’t force it. And if we’re still unsure, it’s okay to step back. When we replace light switch hardware, trusting our gut matters. If in doubt, call a licensed electrician. It’s always better to be safe than sorry.
You Did It! Here’s What You’ve Gained
We did it! We learned how to replace light switch parts safely—and now the light turns on like a charm. Let’s be honest, that took guts. But we followed each step, stayed safe, and got the job done right. We saved money, gained confidence, and tackled real home wiring without calling in a pro.
So go ahead—pat yourself on the back. Next time something breaks, we’ll remember just how capable we really are.
Frequently Asked Questions (FAQ) Replace Light Switch
1. Do I need to turn off the power at the breaker before replacing a light switch? Yes—always! Turning off the power at the breaker is the safest way to avoid shocks or accidents while working with wires.
2. How do I know which type of switch to buy? Check the old switch first. If it controls one light, it’s likely a single-pole. Two locations? You probably need a three-way.
3. What if my voltage tester still shows power after I turn off the breaker? Try another breaker—circuits are sometimes mislabeled. Don’t move forward until the voltage tester confirms it’s safe.
4. Can I replace a light switch without any electrical experience? Yes, as long as you follow safety steps and take your time. This is one of the easiest beginner-friendly wiring jobs.
5. When should I call a professional instead? If you see aluminum wiring, feel unsure about the setup, or something doesn’t seem right—call a licensed electrician. Better safe than sorry!