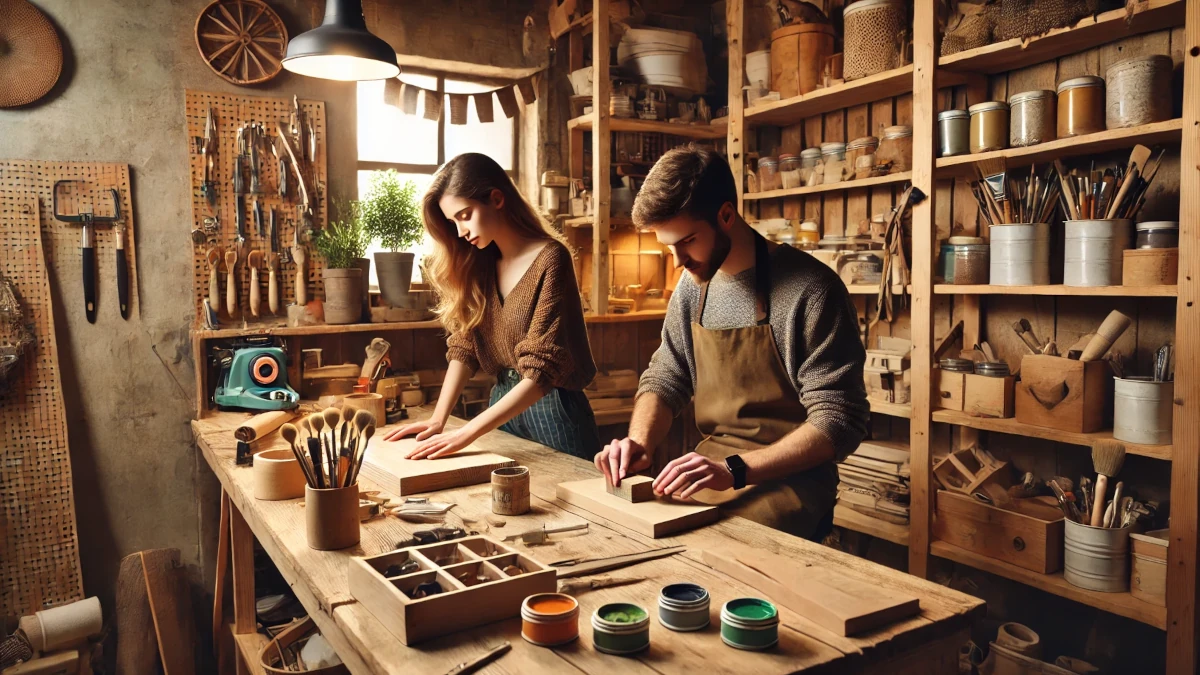
Have you ever wondered how easy it could be to transform your space with DIY wall art? Creating your own wall decor is not only a fun way to personalize your home, but it’s also a great way to express your creativity—even if you’re a beginner. We’re all about simple, affordable projects, and the best part is that you can grab all the supplies you need right on Amazon. No complicated tools or fancy skills are required!
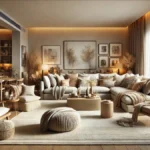
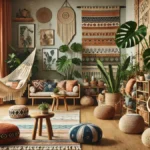
Lately, bohemian style has been making waves in home decor, with its earthy tones and free-spirited vibe. If you’ve been looking to add a little boho charm to your walls, DIY wall art is a perfect way to do it. We’ve put together 5 easy DIY projects that anyone can tackle, whether you’re a seasoned crafter or just getting started. Ready to roll up your sleeves and make your space uniquely yours? Let’s dive into these beginner-friendly ideas!
Project 1: Canvas Board Abstract Art
Our first project is perfect for beginners who want to dive into the world of DIY wall art—Canvas Board Abstract Art. Abstract art offers endless possibilities to express yourself, making it a great choice for anyone just starting out. Plus, with just a few materials, you can create something truly unique for your home.
Materials Needed
You’ll need three basic items for this project: canvas boards, an acrylic paint set, and paintbrushes. These materials are easily available on Amazon, making it super convenient to gather what you need.
Step-by-Step Instructions
- Prepare Your Workspace: Lay down some newspaper or a plastic sheet to protect your workspace from paint splatters.
- Pick Your Colors: Choose a few colors from your acrylic paint set. If you want to create a bohemian look, go for earthy tones like browns, muted oranges, or soft greens.
- Start With Base Layers: Begin by applying a base layer of one color across the entire canvas. Don’t worry about being perfect—abstract art is all about freedom!
- Create Your Design: Use your paintbrush to experiment with blending colors and adding geometric shapes like triangles or circles. For a more bohemian feel, add free-flowing lines or swirls that evoke nature and organic movement.
- Add Depth: Layer different shades or blend colors directly on the canvas to create a textured look. The more you play around with it, the more interesting it becomes!
- Let it Dry: Once you’re happy with your design, let the canvas dry for a few hours.
Bohemian Style Element
To capture a bohemian vibe, stick to natural, earthy tones like terracotta, sage, and beige. These colors reflect the grounded, relaxed atmosphere that defines bohemian style. Incorporating free-flowing shapes rather than rigid patterns also enhances this laid-back aesthetic.
Personalization Tips
Abstract art gives you total freedom to express your personal style. If you love bold colors, don’t be afraid to throw in some brighter shades. If minimalism is more your thing, stick to softer tones and simple shapes. The key is to let your imagination run wild!
Estimated Cost & Time
You can get a set of canvas boards and an acrylic paint set for under $30, making this an affordable project. Depending on your design, the entire process should take about 1-2 hours, plus drying time.
Now, you’re ready to create stunning DIY wall art that reflects your personality and adds a stylish touch to any room!
Project 2: DIY Macrame Wall Hanging
Our second project brings a touch of texture and warmth to your space with a DIY macrame wall hanging. This simple yet elegant craft adds dimension to your walls, perfect for achieving that cozy, bohemian vibe. With a few basic materials and beginner-friendly techniques, you can easily create a beautiful, handmade macrame piece for your home.
Materials Needed
For this project, you’ll need macrame cord and a wooden dowel. Both are easy to find on Amazon and available in various sizes and styles, giving you flexibility in how large or small you want your wall hanging to be.
Step-by-Step Instructions
- Prepare Your Cord: Measure and cut several lengths of macrame cord, ensuring they’re long enough for your desired design. For a beginner, 8-10 cords, each about 6-8 feet long, is a good starting point.
- Attach the Cord to the Dowel: Fold each cord in half and use a simple lark’s head knot to attach them to the wooden dowel. This will be the base for your macrame design.
- Start Knotting: Using basic macrame knots like the square knot and half hitch, begin creating rows of knots. These simple patterns are great for beginners and add an organic, flowing feel to your wall hanging.
- Create Your Design: Alternate between different knots to add variety and texture. You can leave some cords loose at the bottom or trim them into a V-shape for added style.
- Hang It Up: Once you’re happy with your design, tie a piece of cord to each end of the dowel and hang your macrame piece on the wall.
Bohemian Style Element
Macrame wall hangings are a staple in bohemian decor, thanks to their natural textures and relaxed aesthetic. For an authentic boho look, focus on simplicity—use unbleached, neutral-colored macrame cord and keep the design loose and free-flowing. This style is all about embracing natural materials and creating a sense of ease.
Personalization Tips
To make your macrame wall hanging unique, consider adding beads or wooden accents. You could also dye the macrame cord with natural dyes to introduce subtle color variations that fit your home’s color scheme.
Estimated Cost & Time
You can find macrame cord and a wooden dowel for around $20 to $30, depending on the size you choose. This project will take 1-2 hours, making it a quick and budget-friendly way to add some DIY wall art to your home.
Now you’ve got a beautiful piece of DIY wall art that brings bohemian charm and texture to your space!
Project 3: DIY Watercolor Botanical Prints
Our third project is ideal for those who want to add a personal, nature-inspired touch to their home: DIY Watercolor Botanical Prints. This minimalist approach to DIY wall art allows you to create soft, beautiful images of plants and flowers that fit perfectly into a bohemian-style decor. Best of all, it’s simple, even for beginners!
Materials Needed
For this project, you’ll need watercolor paper, a watercolor paint set, and paintbrushes. These materials are readily available on Amazon, and a basic set is more than enough to get you started.
Step-by-Step Instructions
- Prepare Your Paper: Cut your watercolor paper to the desired size. You can create multiple small prints or focus on a larger piece for a statement wall.
- Choose Your Colors: Select soft, natural tones such as greens, earthy browns, and light pinks. These colors work well with the bohemian aesthetic, which emphasizes a connection to nature.
- Sketch Lightly (Optional): If you’re unsure about painting freehand, lightly sketch your design on the paper. Leaves, flowers, or cacti are perfect choices for a minimalist botanical theme.
- Start Painting: Use gentle strokes with your paintbrush to create the leaves, petals, or stems. Watercolors blend easily, so don’t worry about perfection—embrace the fluidity and let the colors flow.
- Add Layers: Once your first layer is dry, add a few more strokes to enhance certain areas. Keep it light and airy; the goal is a minimalist, natural look.
- Frame Your Print: After the painting is dry, frame your artwork for an extra polished touch. Simple wooden frames will enhance the bohemian feel.
Bohemian Style Element
Botanical prints are a staple in bohemian decor due to their organic, earthy vibe. In this project, focus on using soft, natural colors to capture the essence of plants and flowers. Watercolor’s subtle blends and light strokes perfectly match the laid-back, nature-focused aesthetic of the bohemian style.
Personalization Tips
You can customize your watercolor botanical prints by choosing plants or flowers that have personal significance. Experiment with colors and designs that complement your home’s color palette. Don’t be afraid to add abstract elements or pair multiple prints together for a gallery wall effect.
Estimated Cost & Time
For around $25-$35, you can purchase a watercolor set, paper, and brushes. This project typically takes 1-2 hours, depending on the number of prints and layers you wish to create.
With this DIY wall art project, you’ll bring the beauty of nature into your home with your very own handmade watercolor prints!
Project 4: Fabric Wall Art with Tapestry
Our fourth project offers a simple yet striking way to enhance your space with DIY wall art: Fabric Wall Art with Tapestry. Whether you choose to frame a smaller tapestry or hang a large one using rods, this project is a fantastic way to introduce texture, color, and a touch of bohemian charm to your home.
Materials Needed
To create this project, you’ll need a tapestry (available in various sizes and designs), along with a wooden frame for smaller pieces or hanging rods for larger ones. All of these materials can be easily found on Amazon, allowing you to choose the best option for your wall.
Step-by-Step Instructions
- Choose Your Tapestry: Select a tapestry that fits your room’s theme. For a bohemian look, go for tapestries with intricate patterns, mandalas, or nature-inspired designs. These earthy, artistic patterns are a staple of bohemian decor.
- Prepare Your Materials: For a small tapestry, use a wooden frame to give it a polished, professional appearance. For a larger piece, consider using hanging rods to achieve a more relaxed, free-flowing display.
- Frame Your Tapestry: If you’ve chosen a smaller tapestry, stretch it gently across the frame, securing it with staples or adhesive on the back. Make sure the design is centered for a balanced look.
- Hang Your Large Tapestry: If you’re working with a larger tapestry, attach hanging rods to the top and bottom. This not only supports the fabric but also adds an extra decorative element to the piece.
- Display: Once your tapestry is framed or hung on rods, place it on your wall. Larger tapestries work beautifully above a bed or sofa, while smaller ones can be part of a gallery wall.
Bohemian Style Element
Tapestries are a go-to decor item for achieving a bohemian-style room. Their soft textures and intricate patterns create a cozy, artistic atmosphere. Look for tapestries with mandalas, floral designs, or abstract patterns to keep in line with the bohemian theme.
Personalization Tips
Make sure to choose tapestries that reflect your room’s color scheme and overall vibe. You can go bold with vibrant patterns or stick with neutral tones for a more subdued look. Feel free to mix and match with other decor elements, such as pillows or rugs, to create a cohesive style.
Estimated Cost & Time
Depending on the size and quality, you can find tapestries and framing or hanging materials for around $30-$50. Framing a tapestry or setting up a hanging display can be completed in under an hour, making this an easy, affordable way to create beautiful DIY wall art for your space.
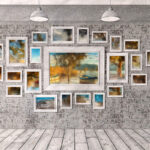
Project 5: DIY Photo Collage with Bohemian Frames
Our final project brings a personal and artistic touch to your space: DIY Photo Collage with Bohemian Frames. This project allows you to create a unique, visually appealing display of photos or artwork, all while incorporating the relaxed, earthy tones of bohemian decor. The result is a stunning piece of DIY wall art that reflects your memories and personal style.
Materials Needed
To get started, you’ll need a set of photo frames, ideally with a bohemian aesthetic. Think of mismatched frames, distressed wood, or ornate carvings that fit the style. You’ll also need printed photos or postcards to fill the frames. These materials are all available on Amazon, making it easy to order everything in one go.
Step-by-Step Instructions
- Gather Your Photos or Art: Choose images that tell a story or evoke emotion. This could include personal travel photos, inspirational quotes, or small prints of nature scenes. Bohemian style is all about organic and free-spirited elements, so pick images that align with those themes.
- Select Your Frames: Use a variety of frames—different sizes, colors, and textures. Mismatched frames or those made from natural materials like wood will add to the bohemian vibe. Arrange the frames on the floor first to plan the layout before hanging them on the wall.
- Create a Layout: Start by placing the largest frame in the center and work your way outward, arranging smaller frames around it. This will help create a balanced, cohesive look. Feel free to experiment with spacing and alignment—bohemian decor embraces asymmetry and creativity.
- Hang Your Frames: Once you’re happy with the layout, start hanging your frames on the wall. Use a level to ensure they’re straight, but don’t worry about perfect symmetry; the bohemian style thrives on a little unpredictability.
- Add Finishing Touches: Once the collage is hung, step back and admire your work! You can add other boho accents like hanging plants or macrame to complement the collage.
Bohemian Style Element
Mismatched frames, distressed wood, and a variety of textures are key to creating a bohemian-style photo collage. The bohemian aesthetic is all about embracing an eclectic, earthy vibe, and using a variety of frames adds to this relaxed charm.
Personalization Tips
Include personal travel photos, small art prints, or meaningful quotes that resonate with you. This project allows for complete personalization, so feel free to get creative with the imagery.
Estimated Cost & Time
A set of frames and printed photos will cost around $30-$50, depending on how many frames you use. This project can take 1-2 hours, depending on how detailed you want to get with the layout.
With this DIY wall art, you can showcase cherished memories in a way that fits perfectly with bohemian decor!
DIY Wall Art Conclusion
In this guide, we’ve explored 5 easy DIY wall art projects—Canvas Board Abstract Art, Macrame Wall Hanging, Watercolor Botanical Prints, Fabric Wall Art with Tapestry, and a Photo Collage with Bohemian Frames. Each of these projects is beginner-friendly, affordable, and a great way to add a personal touch to your home decor.
Whether you want to experiment with paint, textiles, or photo arrangements, these projects offer a creative outlet that allows you to bring your vision to life. Plus, they all tie seamlessly into the bohemian style, with its emphasis on natural elements, earthy tones, and a relaxed, eclectic vibe.
Now is the perfect time to express your creativity and make your home a reflection of your personality. Ready to get started? You can find all the materials you need on Amazon. Check out the links, gather your supplies, and begin your DIY journey today. Let’s create something beautiful!
Frequently Asked Questions (FAQ) About DIY Wall Art
Do I need to have artistic skills to try DIY wall art? Not at all! Many DIY wall art projects are beginner-friendly and don’t require advanced skills. Whether it’s simple abstract painting or hanging a tapestry, these projects are designed to be easy and fun, even for first-timers.
How much will these DIY wall art projects cost me? Most projects can be completed for $30-$50, depending on the materials and size. You can find affordable supplies like canvas boards, macrame cord, and frames on Amazon, making it easy to stay within budget.
Can I customize these projects to fit my home decor? Absolutely! DIY wall art is all about personalization. Feel free to experiment with different colors, textures, and designs to match your style. Each project can be tailored to fit your room’s color scheme and overall vibe.
How long do these DIY wall art projects take? Most of the projects we’ve listed can be completed in 1-2 hours, depending on the complexity of the design. Some projects, like macrame or painting, may require drying time, but they are all manageable in a short amount of time.
What makes these projects fit the bohemian style? Bohemian style is all about embracing natural elements, earthy tones, and relaxed, eclectic decor. The projects we’ve shared—such as macrame and botanical prints—incorporate these themes with natural materials, free-flowing designs, and earthy colors that fit perfectly into a boho-inspired space.